Taking attendance with a scanner
To utilize this feature you will first need to turn on the configuration titled: Turn on to allow admins to use a barcode scanner to checkin and checkout.
Support Notes
- This feature only supports USB compatible devices for scanning. There are no application based scanning capabilities.
- This feature will allow you to scan the merge operator titled Order Product Participant Barcode Large or Small which can be added to a media certificate.
- This feature can also scan the Order Summary Price with Bar Code merge operator found in the Global Order Confirmation, Order Product Confirmation or Order Participant Confirmation.
- Scanning is only supported in the product's attendance screen. Scanning is not supported in the Advanced Check In feature.
- The event product must contain a schedule created on the product's calendar tab.
Getting Started:
Create your event as you would any other. Ensure on the Calendar tab that you have a calendar schedule created for your event. See the Calendar Help File for more information on creating Calendar schedules.
Note: The configuration value "Enable to automatically create a schedule on the calendar when an event is created" will automatically create a calendar schedule for your event if set to On
The Day Of:
Attendance is available to Staff Members assigned to the event, as well as on the Product or admin Calendar. See the Calendar Help File for more information on assigning staff.
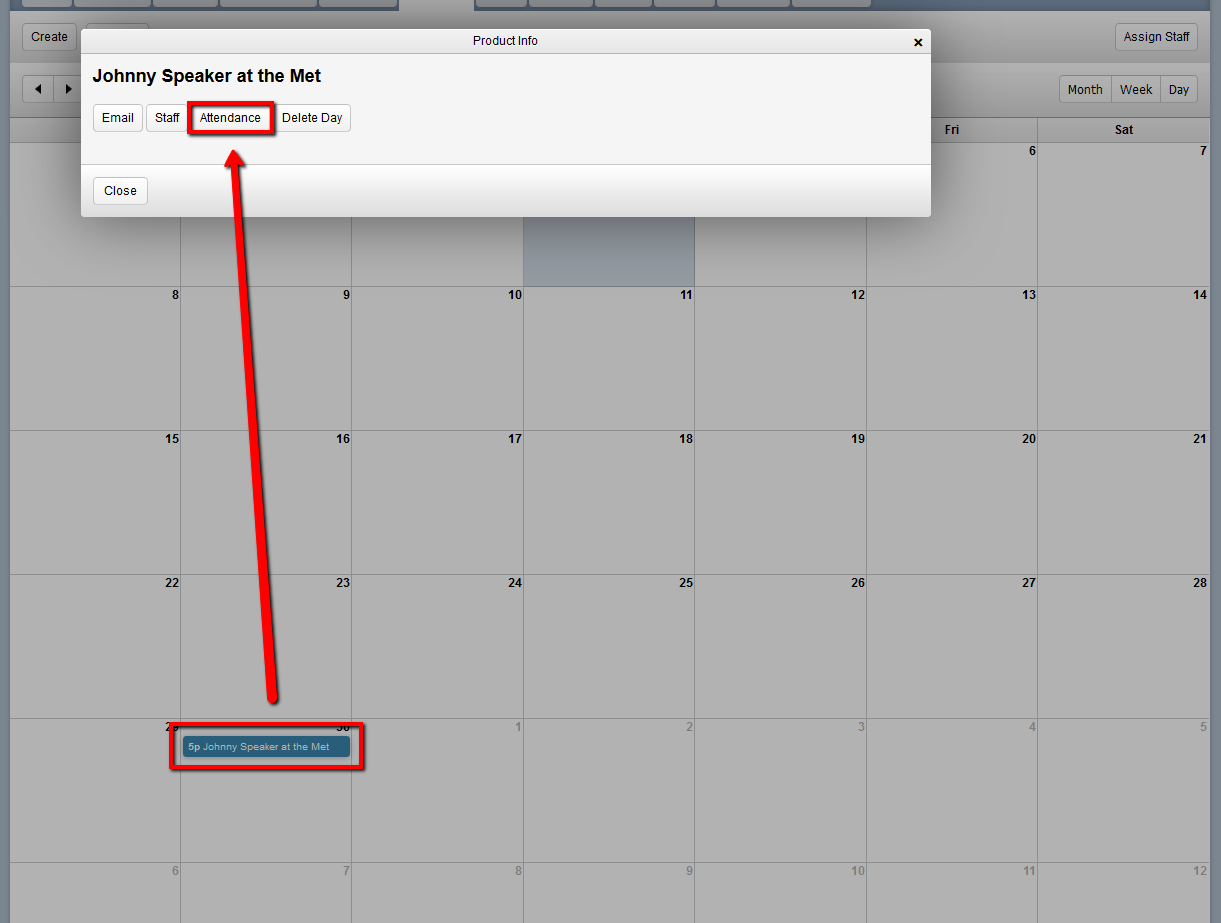
How to as a Staff: Navigate to Staff > Staff Schedule and click on the Calendar date. Click Attendance on the resulting modal. Click here to learn more about how to create a staff user profile.
How to as an Admin: Navigate to Products, select your product and the Calendar tab. Click on the Calendar Date and then on Attendance.
Admin Calendar: Navigate to Settings > Calendar, select the Calendar Date, then click on Attendance.
Attendance is available to Staff Members assigned to the event, as well as on the Product or admin Calendar. See the Calendar Help File for more information on assigning staff.
How to as a Staff: Navigate to Staff > Staff Schedule and click on the Calendar date. Click Attendance on the resulting modal. Click here to learn more about how to create a staff user profile.
How to as an Admin: Navigate to Products, select your product and the Calendar tab. Click on the Calendar Date and then on Attendance.
Admin Calendar: Navigate to Settings > Calendar, select the Calendar Date, then click on Attendance.
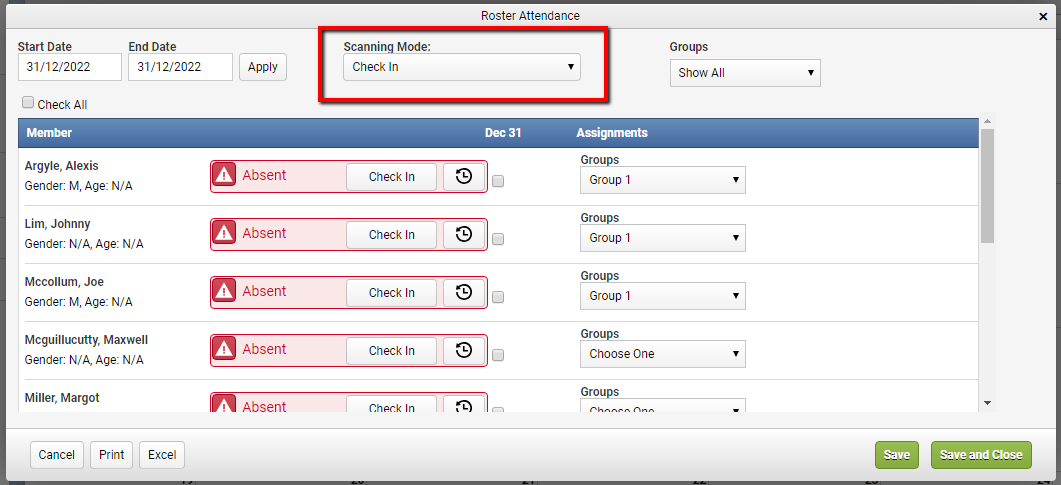
After clicking on Attendance, you will see a list of all Participants who are registered for the event. Switch the Scanning Mode to your desired action.
With this attendance modal open, confirm that your USB scanner is plugged in and scan the barcode.
Related Articles
Taking Attendance
Introduction Configio allows you to take attendance for your events, as well as monitor check in and check out. For Example: You have organized a speaking engagement and need to check in attendees. Getting Started Create your event as you would any ...Roster Group and Assignments
Example: You have an event and would like to have multiple teams and give them a specific instructor for your staff to manage on the day of the event. How To: Under Assignments, choose Roster Groups. The Unassigned column will list all Lists managed ...Managing Credit Card and Payment Processing Fees
Overview There are three different ways to create credit card or payment processing fees in Configio. This can be done by creating a Fee, a Payment Fee, or through Payment Gateways. Each method comes with its own benefits: Fees: allows you to create ...Locations
Overview All Products in Configio need to be assigned to a Location. Creating and assigning Locations to Products allows them to be searched by Title, as well as provides necessary taxation information. Note: All Locations require a Region be ...Responding to Data Requests for Personal Information
Introduction There are several reports that must be built and sent to customers when they request their personal information. It is a two-step process: Step One: Setting-up the reports Step Two: Responding to data requests Step one may be done prior ...